

Are you tired of battling frizz and longing for silky, smooth locks? If so, you may want to consider the best hair keratin treatment at home. This miracle solution has garnered quite a reputation in the beauty world, and the best part? You can achieve salon-quality results in the comfort of your own home, with the added convenience and safety of at-home use—these treatments are specifically designed for easy application without the need for professional help. Let’s dive into the basics of keratin treatments, their benefits, and how to perform one using some of the best keratin straightening at home options available, including the popular Ion Keratin best at home hair therapy treatment. There are many keratin treatments available, ranging from professional salon services to at-home options, and while at-home keratin treatments are generally more accessible and less regulated, this can lead to varying results across different hair types.
At the heart of a keratin treatment kit is the magic ingredient—keratin itself. This natural protein is essential for the health and structure of your natural hair, skin, and nails. Think of keratin as the building blocks that give your hair its strength and resilience. However, everyday styling practices like blow-drying, flat-ironing, and exposure to harsh weather can strip your hair of its natural keratin. This depletion often leads to puffiness, tangles, and an overall lackluster appearance. That sounds frustrating, right? Thankfully, keratin treatments are here to save the day!
When you opt for the best keratin treatment, a professional applies a special formula—known as a professional keratin treatment or salon keratin treatment—to your natural hair that penetrates the strands, replenishing the lost keratin. Salon keratin treatments typically involve highly concentrated active ingredients and chemicals that require expert handling, resulting in more dramatic and longer-lasting results compared to at-home treatments. The result? Natural hair that looks and feels smoother, shinier, and much easier to manage! It’s like giving your hair a much-needed drink of water after a long, hot day. Although traditional at home keratin treatments may contain formaldehyde—an ingredient known for its strong fumes—there are plenty of safer, at-home alternatives that allow you to pamper your hair without the worry.
Whether you visit a salon for an in-salon keratin anti-frizz treatment or do it yourself at home, a keratin treatment can be a fantastic investment in your hair care keratin routine. While salon treatments can last for weeks or more, at-home keratin treatments often provide temporary smoothing benefits that may not last through multiple washes. At-home smoothing treatments are less potent and mainly effective for frizz control without changing the hair’s natural texture. Imagine effortlessly running a brush through your hair while enjoying the reflective sheen that often follows these keratin treatments for home! So, if you’re dealing with unruly locks and damaged strands, finding the best anti-frizz treatment for home might just be the boost your natural hair needs to reclaim its vitality and shine—a convenient alternative to a salon treatment, offering smoothing treatments that are accessible for home use!
If you’re considering an anti puffy hair treatment for home but aren’t entirely sure what all the buzz is about, you’re in the right place! This at home hair straightening treatment has been a game-changer for many, turning puffy prone tresses into silky, and manageable frizz free hair that not only reduces frizz but also fights frizz, making it especially effective for curly or wavy hair textures. Let’s explore the various benefits of anti frizz treatment at home together, shall we?
One of the standout perks of a keratin treatment is their incredible ability to control frizz. If you’re someone who battles with curly, wavy, or even straight hair that tends to puff up at the hint of humidity, an at-home treatment for hair can be your best friend. This best keratin therapy straightening treatment at home works by infusing your hair with keratin—a natural protein found in our hair, skin, and nails.
By doing so, the best keratin therapy treatment at home creates a protective layer around each strand, making it much more resilient against moisture and other environmental stressors. So, when the skies turn grey and the air gets thick, you can step out confidently, knowing your locks will stay sleek and hair smooth with a keratin home treatment.
One of the biggest advantages of doing a keratin treatment at home is the significant reduction in styling time. After the treatment, your hair becomes smoother, more manageable, and less prone to frizz, which means you can spend less time blow-drying, straightening, or using other heat tools. This not only saves you precious minutes each morning but also reduces heat damage over time. Keratin treatments simplify daily styling, making it easier to manage your hair and cutting down the time you spend each day on your hair routine.
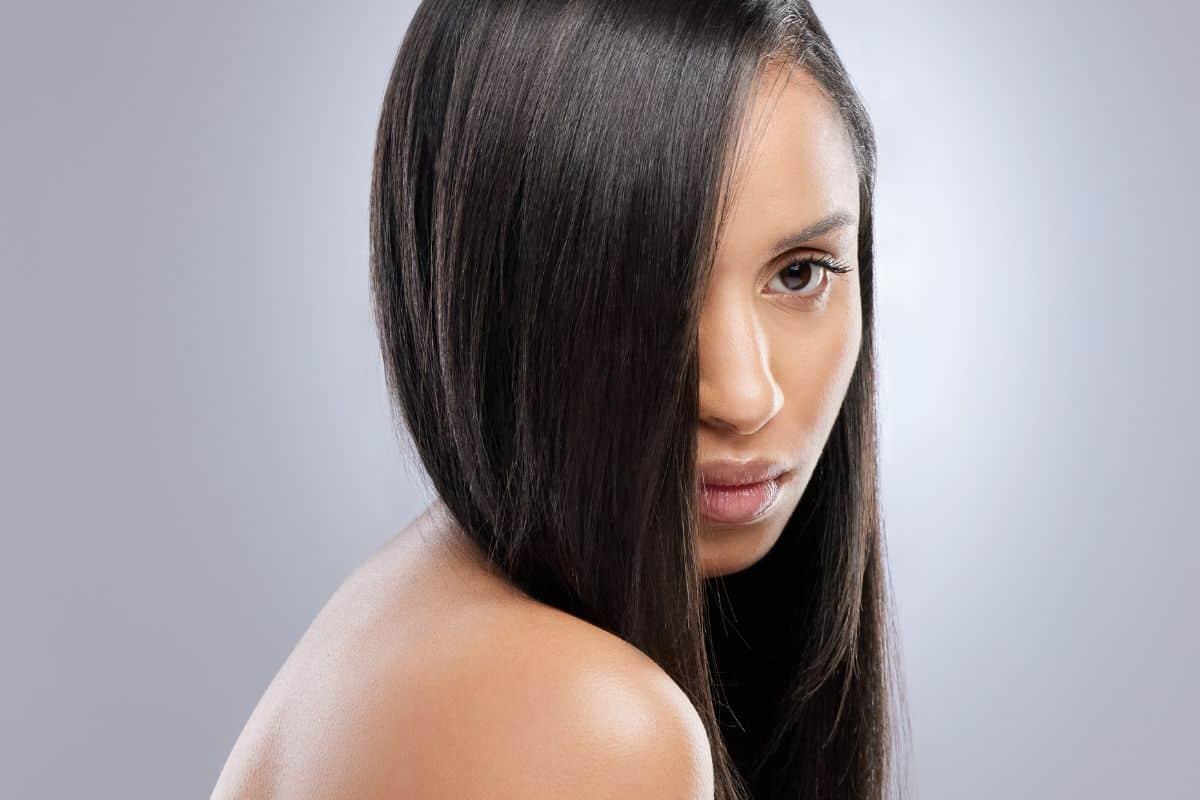
If your hair sometimes looks dull and lifeless, keratin treatments can bring it back to life! These keratin straightening treatment add a beautiful layer of shine to your hair, giving it that radiant, healthy appearance we all crave when it seals the hair cuticle with heat. The added shiny hair from keratin in home treatment is not just for looks; it also helps prevent damaged hair due to environmental factors, making it look fresh and fabulous day after day.
Let’s be honest: we all want that effortless hair look without spending hours in front of the mirror, right? With a good keratin hair treatment, styling time is dramatically reduced. People often report cutting their hair-drying and straightening time in half after treatment! Imagine having more precious minutes in your day for the things you love—whether that’s sipping your morning coffee, squeezing in an extra episode of your favorite show, or just enjoying a few more moments of sleep with a keratin at home straightening treatment.
4. Improved Manageability
Getting tangled hair can feel like a daily struggle. Keratin treatment at home make a significant difference when it comes to managing unruly locks. After applying the best keratin straightening treatment, you’ll find that your hair is much easier to comb through, reducing breakage and stress during your styling routine. Say goodbye to those frustrating battles with your hairbrush and hello to easy, breezy combing with the best keratin treatment kit at home!
5. Long-Lasting Results
One of the best things about anti frizz treatment at home is its longevity. While results can vary depending on your unique hair type and how you care for your hair post the best puffy hair treatment to straighten hair, many people enjoy the benefits for anywhere from a few weeks to several months. Imagine investing a little time and effort and then reaping the rewards for months on end! To prolong the results, it’s essential to use sulfate-free shampoos and conditioners and hair mask with a DIY keratin home hair treatment, as sulfates can strip away that all-important keratin coating.

Now, let’s explore some of the best options for frizzy-hair reducing treatment. While there are many products available, one that consistently stands out is the Ion Keratin Therapy Treatment. Loved for its effectiveness and user-friendly application, this treatment offers salon keratin-like results without breaking the bank. For effective at-home use, only one bottle is needed, making it convenient and a great value. DIY keratin treatment kits like this one provide a budget-friendly alternative to salon treatments, though salon treatments typically last longer and deliver more dramatic results.
Have you ever wondered how to do a frizzy hair reducing treatment at home and admired someone’s sleek, smooth hair and wondered how they achieved that look? The Ion Keratin Smooth Treatment could be your answer! This salon-quality treatment has gained popularity for its ability to reduce frizziness, enhance shine, and give hair a silky-smooth finish. In this friendly guide, we’ll walk you through each step of the process so you can achieve those enviable locks right at home with the best at home anti frizz-free hair treatment for curly hair.
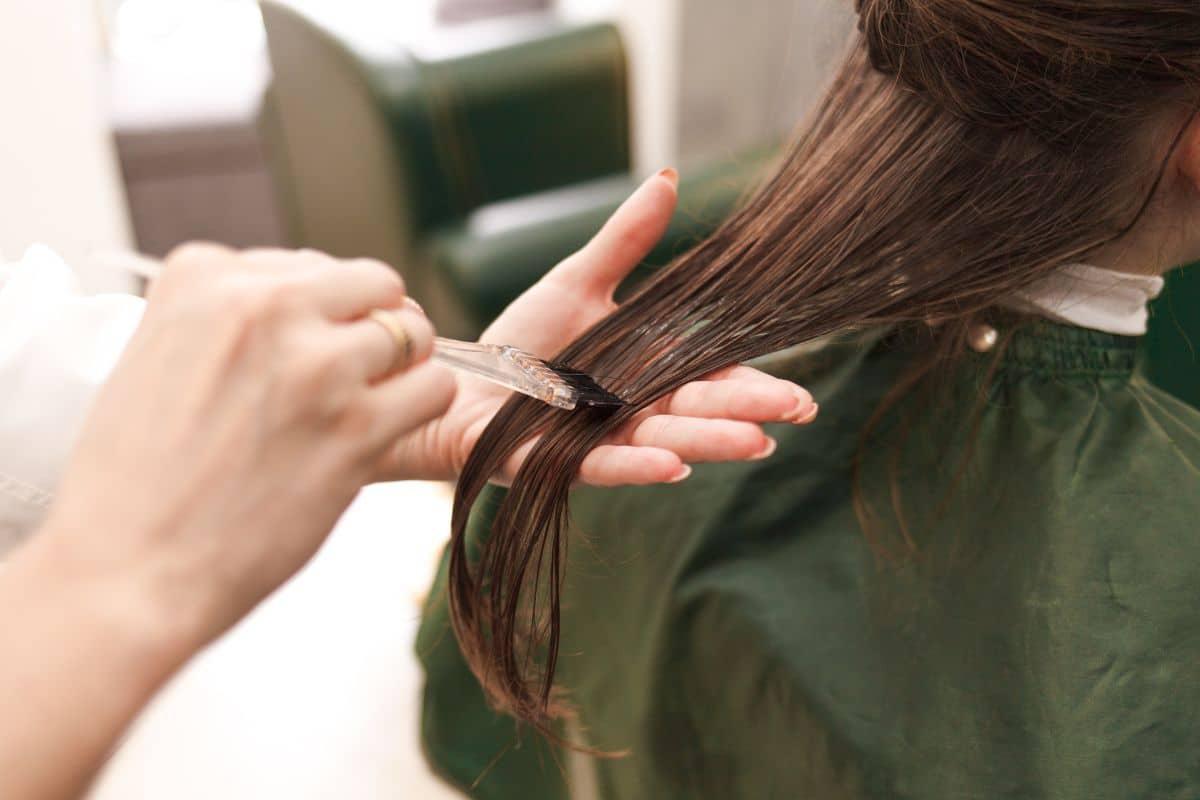
The basic steps of an at-home keratin hair treatment include washing and sectioning your hair, applying a palm-sized amount of product to each section, and letting it sit for about one hour before you rinse thoroughly with water. After rinsing, it is recommended to blow-dry your hair and then use a flat iron at a high temperature to seal the treatment, which helps achieve smoother and frizz-free hair. For optimal results, always divide your hair into sections and ensure the product is evenly distributed.
Before diving into the treatment, preparation is key! Start by ensuring your hair is clean and dry. To do this, wash your hair with a clarifying shampoo. This shampoo is designed to remove product buildup and oils, making it easier for keratin to penetrate your hair effectively. As a result, your treatment will be more successful, providing you with the best possible results.
2. Dry Your Hair: Getting Ready for Application
Once your hair is freshly washed, it’s important to dry it properly. Gently towel-dry your hair to remove excess moisture, then use a blow dryer to dry your hair completely. This step is crucial because applying the treatment to wet hair can dilute the product, reducing its effectiveness.

3. Section Your Hair: Making Application Easier
To ensure even application of the treatment, divide your hair into four manageable sections—two at the front of your head and two at the back. This will help you focus on one area at a time, making the process more organized and efficient.
4. Apply the Treatment: Let’s Get Started!
Now it’s time to apply the Ion anti frizz treatment at home! Put on a pair of gloves to protect your hands and give the treatment bottle a good shake to ensure the product is well-mixed. Using a fine-tooth comb, apply the anti frizzy treatment kit evenly throughout one section at a time. It’s important to coat each strand thoroughly, but avoid oversaturation, as this could lead to a greasy finish once the treatment is complete.
5. Comb Through: Ensuring Even Distribution
After applying treatment, take a moment to comb through your hair with a wide-tooth comb. This step is essential to ensure that the product is evenly distributed, penetrating each strand for maximum effect. Think of this as your personal mini-massage for your hair!
6. Process the Treatment: Patience Pays Off
Once you’ve applied the at-home keratin treatment kit for curly hair to your satisfaction, it’s time to allow it to process. The recommended processing time is usually between 30 to 60 minutes, depending on how smooth you want your hair to be. Grab a book or enjoy a cup of coffee while you wait—your hair will thank you!
7. Blow Dry: A Little Heat Goes a Long Way
After the processing time is up, it’s time to blow-dry your hair. Set your blow dryer to a medium heat setting and blow dry your hair until it’s completely dry. This step helps to seal the keratin smooth treatment at home into your hair and prepares it for the final finishing touches.
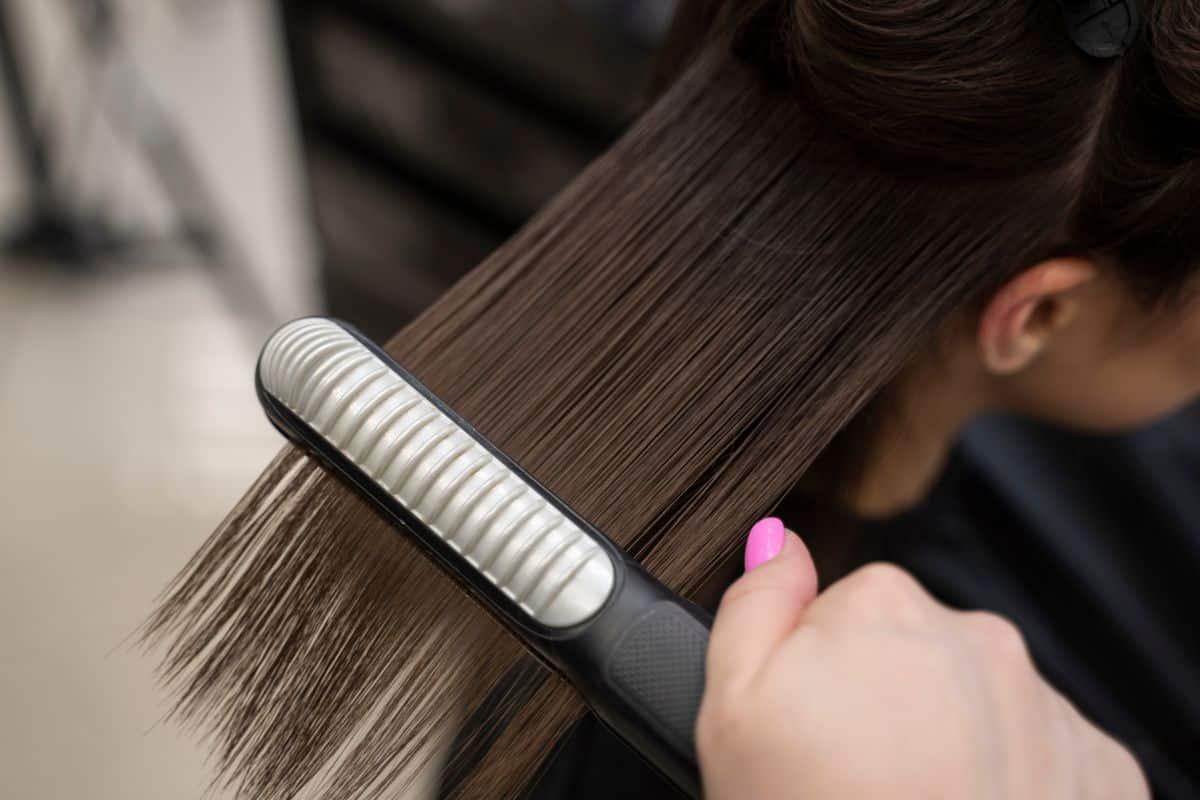
8. Flat Iron: The Finishing Touch
To fully lock in the keratin, you’ll need to use a flat iron. Re-section your hair into smaller parts for easier handling. Using a flat iron, pass through small sections of hair from root to tip. Make sure to set your flat iron to the recommended temperature for your hair type, usually between 350-450°F. This will ensure you get the smooth finish from your at home therapy treatment you desire without causing damaged hair.
9. Final Wash: Maintaining Your Gorgeous Locks
Great job! You’ve completed the treatment, but there is one last thing to keep in mind. You’ll want to wait a couple of days before your first wash to give the treatment ample time to set. After this period, opt for sulfate-free shampoo and conditioner. These products are gentle and will help maintain the effects of your frizz reducing treatment, keeping shinier hair and smooth for weeks to come.

Before you dive into your at home keratin treatment, it’s essential to prioritize safety for both you and your hair. Many keratin hair treatment kits contain powerful ingredients—sometimes including chemicals like formaldehyde, methylene glycol, or glyoxylic acid—that can cause irritation if not handled properly. Always read the label and opt for formaldehyde free or clinically tested formulas when possible, especially if you have sensitivities.
Work in a well-ventilated area to avoid inhaling fumes, and never skip the patch test: apply a small amount of the product to your skin 24 hours before full use to check for allergic reactions. Protect your hands with gloves and consider wearing eye protection during application to prevent accidental splashes. Keep all keratin products out of reach of children and pets, and never mix different treatments together, as this can cause unpredictable chemical reactions.
Finally, always follow the manufacturer’s instructions to the letter—using too much product or leaving it on too long can lead to dry hair or scalp irritation. With these simple precautions, you can enjoy smooth, frizz free hair safely and confidently at home.
Keratin treatments aren’t one-size-fits-all—your hair type plays a big role in how you’ll experience the results. If you have fine hair, choose a lightweight, formaldehyde free formula to avoid weighing your strands down. For thick, coarse, or curly hair, a more intensive keratin protein treatment can help tame frizz and enhance manageability, but may require a higher heat setting on your flat iron for optimal results.
Colored or chemically treated hair can benefit from keratin’s repairing properties, as it helps seal the hair cuticle and lock in shine, but always check that your chosen product is safe for color-treated hair to prevent fading. Damaged hair will appreciate the smoothing and strengthening effects of hydrolyzed keratin and natural seed extracts, which help repair split ends and restore shine.
No matter your hair texture—straight, wavy, or curly—there’s a home keratin treatment kit designed for you. Just remember, results and longevity can vary based on your hair’s unique needs, so choose a product tailored to your hair type for the best keratin treatment experience.
Even the best at home keratin treatment can fall short if you make a few common mistakes. One frequent error is skipping the clarifying shampoo step—this leaves behind residue that blocks the keratin from fully penetrating the hair cuticle. Another pitfall is using too much product, which can leave hair greasy or limp; always apply a thin, even layer.
Be mindful of your flat iron temperature: too low won’t seal in the treatment, while too high can cause heat damage, especially on fine or damaged hair. Don’t rush to wash your hair—wait the recommended time after treatment to let the keratin set for frizz free, shiny hair. Using sulfate shampoos or harsh chemicals post-treatment can strip away the smoothing effects, so stick to sulfate free shampoo and gentle conditioners.
Lastly, don’t forget heat protection when styling after your treatment. By avoiding these mistakes, you’ll ensure your keratin hair treatment delivers salon-quality, manageable locks every time.
To keep your hair smooth and frizz free long after your at home keratin treatment, a little extra care goes a long way. Always use a sulfate free shampoo and conditioner to gently cleanse without stripping away the keratin coating. Limit washing to extend the life of your treatment, and opt for lukewarm water to help maintain shine.
Brush your hair gently with a wide-tooth comb or soft brush to prevent breakage, and avoid saltwater or chlorine, which can weaken the keratin layer. Incorporate a deep conditioner or leave-in treatment with keratin amino acids or argan oil once a week to keep your hair hydrated and soft. Minimize heat styling, but if you do reach for your blow dryer or flat iron, always use a heat protection spray.
With these simple steps, you’ll enjoy manageable, shiny hair and prolong the benefits of your home keratin treatment—making every wash day a good hair day!
With the right approach, a good at DIY keratin treatment like the Ion Keratin therapy smooth treatment at home can revolutionize your hair care routine. Not only will you save money on hair stylist salon visits, but you’ll also achieve beautiful, manageable hair that shines with these smooth results at home. So why wait? Embrace the luscious locks you’ve always wanted, and enjoy the delightful journey that comes with keratin at home pampering. Happy styling!


Hi, I’m Danian, the creator of Natalie Mochin’s Beauty Blog — a space dedicated to real, experience-based hair care tips, healthy hair advice, and hair growth inspiration. As a hairdresser in training, I share practical routines, product recommendations, and lessons from my hands-on salon experience — all fueled by my love for coffee, cats, and dogs.

Hi, I’m Danian, the creator of Natalie Mochins Beauty Blog. As a hairdresser in training, I share practical routines, product recommendations for healthier hair from my hands-on salon experience- All fueled by my love for coffee and mochaccinos.
As a hair care enthusiast, I have discovered the best option for my hair in terms of maintenance and versatility. My strands are currently texturized
If you have curly hair, you already know the morning struggle — frizz, shrinkage, humidity, tangles. It’s exactly why keratin treatments have exploded in popularity.
Subscribe now to keep reading and get access to the full archive.