
The ultimate silk press tutorial: If you’re looking for a way to achieve shiny, straight hair without the commitment of a relaxer, a silk press might be just what you need! This technique has taken the natural hair community by storm for its ability to transform curls into sleek styles that shimmer. In this friendly guide, we’ll walk you through everything you need to know about a silk press tutorial, from the basics to maintenance and best hair products for silk press, so you can rock this look confidently!
A silk press is a method of straightening natural hair using heat, specifically with a flat iron. It gives hair a smooth, shiny finish that resembles the softness of silk. Unlike traditional pressing hair, which often requires heavy oils and products that can weigh hair down, a silk press focuses on using minimal product to achieve a light, bouncy finish. The result? Hair that appears healthy and radiant!
1. Start with Clean Hair
How to do a silk press: Before you begin the process, it’s crucial to start with clean hair. This means washing your hair with a sulfate-free shampoo, and preferably a clarifying shampoo, which is gentle and won’t strip your hair of its natural oils. Follow this with a deep conditioning treatment to nourish your strands. A well-conditioned base is essential, as it helps to ensure that your silk press lasts longer and looks better. Remember, clean hair is key for a lasting press! My favorite clarifying shampoo is shampoo 2 by Paul Mitchell.
2. Apply Heat Protectant
After you’ve towel-dried your freshly washed hair in this silk press tutorial, it’s time to shield your strands from potential heat damage. Applying a silk press heat protectant serum or spray is a must. This step acts as your hair’s first line of defense against the high temperatures of your styling tools. Make sure to distribute the heat protectant for silk press evenly through your hair for maximum protection, ensuring that every strand is covered. One of the best heat protectant to use is the Mielle avocado leave in conditioner for silk press which will give you the straightness you desire while protecting your hair.
3. Blow-Dry
Now comes the blow-drying phase in this silk press tutorial! If you want to learn to silk press at home, start by sectioning your hair into manageable parts—this not only makes the process quicker but also more efficient. Use a round brush while you blow dry each section with a hair dryer, aiming to create a straight style as you dry with a blow dryer. The goal here is to minimize the time you’ll need to spend with the flat iron, reducing the potential for heat damage. Blow-drying can be a bit tedious but keep in mind that it’s an essential step in achieving that sleek finish.
4. Flat Iron Time
Once your hair is dry, it’s flat iron time in this silk press tutorial! Make sure your flat iron is preheated to the appropriate temperature: around 380°F for medium to fine hair, and 430°F for coarse hair. It’s essential to work with small sections of hair for the best results and using the best flat iron for 4c silk press.
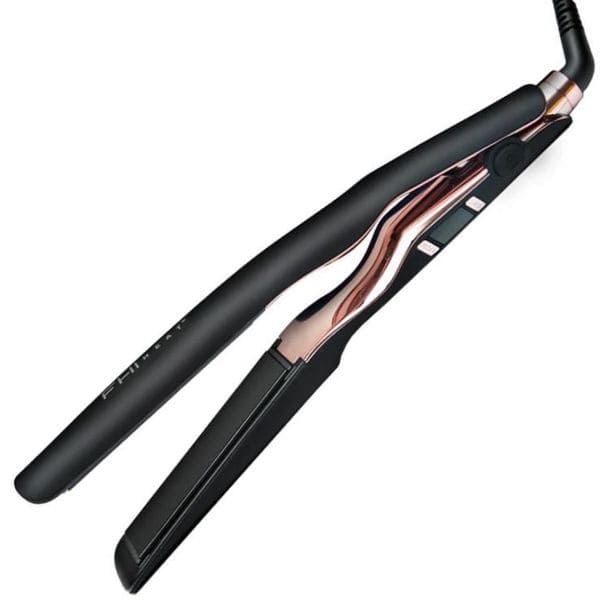
I personally like using the FHI Curve pro styling iron because it gives an immaculate shine to the hair. The technique here is known as “chasing.” You’ll be gliding the flat iron down each section while following closely behind with a fine-toothed comb. This method helps to ensure uniform straightness and shine, giving you that coveted silk press finish.
5. Finish Off
After you’ve finished pressing natural hair, it’s time for the final touches in this silk press tutorial. You can enhance the shine of your silky strands by adding a light serum or oil for silk press such as biosilk for silk press. Silk press spray not only elevates the glossy look of your hair but can also help control any frizz. And just like that, you’re ready to show off your gorgeous, sleek locks! Thanks for reading this blog post on how to press hair.
If you are wondering how to make silk press last and how long does a silk press last, a silk press can last anywhere from one week to a month, depending on your hair type, environmental conditions, and maintenance routines.
Keratin Treatment
A keratin treatment is a chemical smoothing process that infuses the hair with additional keratin, aiming to restore and revive your hair’s health. The procedure typically involves applying a keratin-infused solution to the hair, followed by the use of heat to seal the treatment in. The result? Sleek, shiny, and manageable hair that can endure daily styling and combat environmental stressors.
Why Pair Keratin Treatments with Silk Press?
1. Extended Longevity: In this silk press tutorial: Silk presses, which are known for their high shine and sleek finish, can sometimes lose their luster and bounce within a few days due to humidity and frizz. By applying a keratin treatment beforehand, you’re essentially preparing your hair to withstand these elements. The keratin helps to create a barrier against humidity, thus prolonging the silky finish of your press.
2. Smoother Hair Cuticle: One of the main advantages of keratin treatments is their ability to smooth down the hair cuticle. When the hair cuticle lies flat, light reflects off the surface more evenly, resulting in that gorgeous shine we all crave. This level of smoothness also minimizes tangles and breakage, making your hair easier to style.
3. Extra Protection: Whether you’re using heat styling tools or simply battling everyday wear and tear, the added layer of keratin delivers essential protection. This is especially crucial if you regularly subject your hair to hot tools like a silk press straightener and curling irons. With less damage from styling, your hair remains healthier over time.
4. Reduced Frizz: Frizz can be a common issue, especially in humid climates, but keratin treatments work wonders in reducing it. Since keratin fills in porous areas on your hair shaft, it effectively seals any split ends and reduces that troublesome puffiness. This means that your silk press will remain flawlessly smooth, even in challenging weather conditions.
5. Enhanced Manageability: If you’ve ever struggled with unruly hair, you know the daily battle that comes with trying to tame it. With a keratin treatment, your hair will typically become much easier to manage, making your silk press process quicker and more efficient. This allows for a smoother styling process and less time spent in front of the mirror.
When it comes to achieving that coveted sleek and silky look, a silk press can be a game-changer for many individuals with a silk press tutorial. This styling technique, often used for natural hair, combines heat with a smoothing agent to create a polished finish. To maximize your results and maintain the health of your hair, keep the following tips in mind.
Consult a Professional
While the allure of at-home silk press kits may be strong when implementing a silk press tutorial, seeking the expertise of a licensed stylist is highly recommended for optimal results. Professionals possess a keen understanding of various hair types and textures, enabling them to tailor the keratin treatment to meet your specific needs. They can assess your hair’s health, recommend suitable products, and adjust the treatment according to any particular concerns you may have. Moreover, a professional can employ techniques that may not be easily replicated at home, ensuring that you achieve that flawless look.
It’s also worth noting that stylists are trained to use tools and products that are safe for your hair type. This not only helps in achieving better results in a silk press tutorial but also significantly reduces the risk of heat damage that might occur during the styling process. Therefore, investing in a session with a professional is a worthwhile decision if you are serious about your silk press and following a silk press tutorial.
Follow Aftercare Instructions
Once you’ve had your silk press done in this silk press tutorial, the next key step is to follow the after care instructions as recommended by your stylist. Proper aftercare plays a crucial role in maintaining the integrity of your keratin or smoothing treatment. Using sulfates can strip your hair of its natural oils, leading to dryness and reducing the longevity of your silk press.
Opt for sulfate-free shampoos and conditioners instead when following this silk press tutorial. These products are gentler on the hair and help retain moisture without compromising the benefits of the keratin treatment. Some products may be specifically designed for color-treated or chemically-treated hair, which could be an excellent choice for individuals who have recently undergone a silk press.
Additionally, incorporating hair oils or leave-in conditioners with good products for a silk press can help lock in moisture and enhance the shine of your hair. Small adjustments to your hair care routine can have a lasting impact on how your silk press looks and feels.
Stay Away from Moisture
In the aftermath of your silk press and following this silk press tutorial, giving your hair some time to set is essential for achieving the best results. For the first few days post-treatment, aim to avoid washing your hair or exposing it to moisture. This is because the keratin needs ample time to fully bond with your hair’s cuticle, which seals in that sleek texture you desire.
Even humidity can pose a challenge during this crucial time. So, limiting outdoor exposure, especially in areas with high moisture levels, can help maintain the smoothness of your press followed in this silk press tutorial. If you find yourself in situations where you feel moisture is unavoidable, consider using an umbrella or a hat.
If you must wash your hair within the first few days, try to plan your style accordingly. Some people prefer to use a scarf or a bonnet to safeguard their freshly styled hair against humidity and environmental factors. Taking these simple precautions can extend the life of your silk press and keep you looking fabulous for as long as possible.
To keep your silk press looking its best:
– Wrap Your Hair at Night: Use a silk or satin scarf or pillowcase to minimize friction as you sleep.
– Avoid Moisture: Steer clear of steam and humidity as much as possible to prevent frizz.
– Limit Washing: Try to wait at least a week before washing your hair. When you do, opt for a gentle, sulfate-free shampoo.
When you’re looking to achieve that sleek, shiny look with a hair silk press, it’s important to set aside enough time to do it right. Generally, you can expect the entire process to take between 2 to 4 hours. On the lower end, if you have fine or shorter hair, you might find yourself in and out relatively quickly. However, if you’re rocking a thicker or longer mane, the process might take a bit longer as your stylist carefully works through each section.
Taking your time during a silk press isn’t just about getting the look you want—it’s about the journey there, too for how to do a silk press on natural hair! When a stylist is meticulous and patient, you’ll end up with a much smoother and polished finish. It’s never a race, and each step—washing, conditioning, blow-drying, and flat-ironing—is crucial in minimizing damage while maximizing shine and style. So, when you schedule your appointment, it’s best to keep this timeframe in mind so you can enjoy the whole experience stress-free!
Now that you know how long a silk press can take, you may be wondering how often you can indulge in this fabulous treatment. To maintain the health of your hair, it’s generally recommended to space out your silk press sessions every 2 to 4 months. This timeframe gives your hair a much-needed breather after the heat styling process.
But why is that important? Well, regular exposure to heat can lead to dryness, breakage, and damaged hair cuticles. By stretching out your silk press sessions, you allow your hair the time it needs to recover and rejuvenate. Think of it as giving your hair a little vacation! During the in-between time, you can focus on keeping it nourished and healthy with moisturizing treatments, hydrating products, and regular trims.
If you’re feeling tempted to go for that ultra-sleek look more often, consider alternative styling methods on your off months. There are numerous heat-free styles and techniques to keep your hair looking fabulous while ensuring you don’t risk compromising its health.
With the right techniques and tips, a silk press can be a gorgeous and manageable way to wear your natural hair straight in your beauty routine. Whether you’re preparing for a special event or just want to switch up your style, learning how to silk press natural hair with this method will leave your hair looking smooth and lustrous. Happy pressing! # Good flat irons for silk press # Hair straightener silk press # Serums for silk press # Silk press hair straightener # Best heat protectant for silk press # Best silk press serum # Silk press products natural hair

Hi, I’m Danian, the creator of Natalie Mochin’s Beauty Blog — a space dedicated to real, experience-based hair care tips, healthy hair advice, and hair growth inspiration. As a hairdresser in training, I share practical routines, product recommendations, and lessons from my hands-on salon experience — all fueled by my love for coffee, cats, and dogs.

Hi, I’m Danian, the creator of Natalie Mochins Beauty Blog. As a hairdresser in training, I share practical routines, product recommendations for healthier hair from my hands-on salon experience- All fueled by my love for coffee and mochaccinos.
Let’s be honest, girlfriend. Have you ever washed your hair, blow-dried it, and still felt like it looked a little flat, dull, or breakage? Like
Is the Unbrush Good for Curly Hair? The short answer is yes, but it depends on how you use it. Coiled and Natural Hair strands
Subscribe now to keep reading and get access to the full archive.